How to Use Stencils to Paint a Wall Mural
A Step-by-Step Guide
Transform plain walls into striking visual displays with custom stencils. Whether you're branding a commercial space or creating an outdoor wall mural, here’s how to apply a mural stencil professionally.
What You’ll Need
- Laser-cut stencil made in polyester film by Lasercutit
- Masking or/and Duct Tape
- Spirit level
- Suitable paint and applicator (brush, spray or roller)
- Mixing trays for paint
- Cloths and gloves
Step 1. Prepare the Wall for the Stencils
- Clean the surface thoroughly (dust, grease and dirt can affect adhesion and paint finish).
- We had already prepared the wall with the underlaying target design

Step 2. Group your layered stencils
When working with multi-layered or large stencils made up of several parts, it's best to group them together in advance to streamline the layout process.

Step 3. Plan Your Layout
- Measure and mark where the stencil will be placed.
- Use a spirit level to ensure alignment — especially for large or repeating designs.

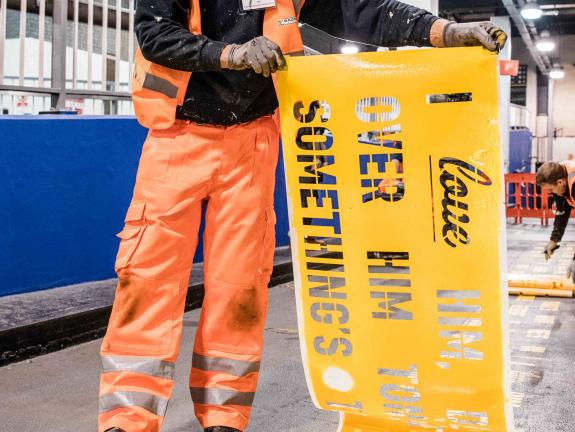
Step 4. Secure the Stencils
- Tape all sides securely to the surface with duct tape
- Double-check positioning before you start painting

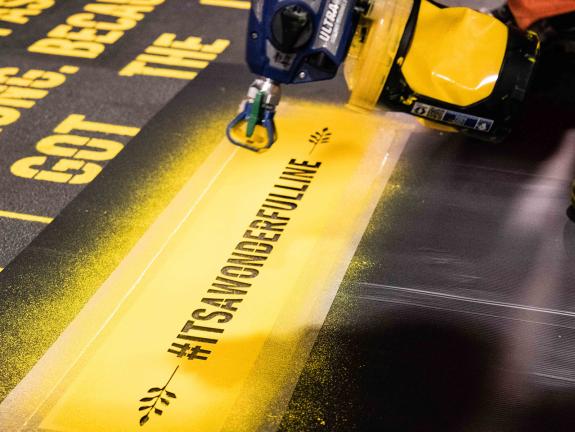
Step 5. Apply the Paint
- Use a stencil brush, roller or spray paint — apply in light, even coats.
- Avoid heavy paint application to prevent bleeding under the stencil

Step 6. Multi-layer stencil
- Apply and paint the first stencil layer and mark registration points for the next layer
- Carefully remove the stencil
- Align registration points and adhere the next layer
- Repeat the painting process

Step 7. Carefully Remove the Stencil
- Gently peel the stencil away from one edge.
- Lift slowly to avoid smudging.

Step 8. Paint the remainder of the mural
- We used the black outline as guide to colour the mural.

Do you need help with a #largestencil? Call 0161 989 0847 Ore email [email protected].